
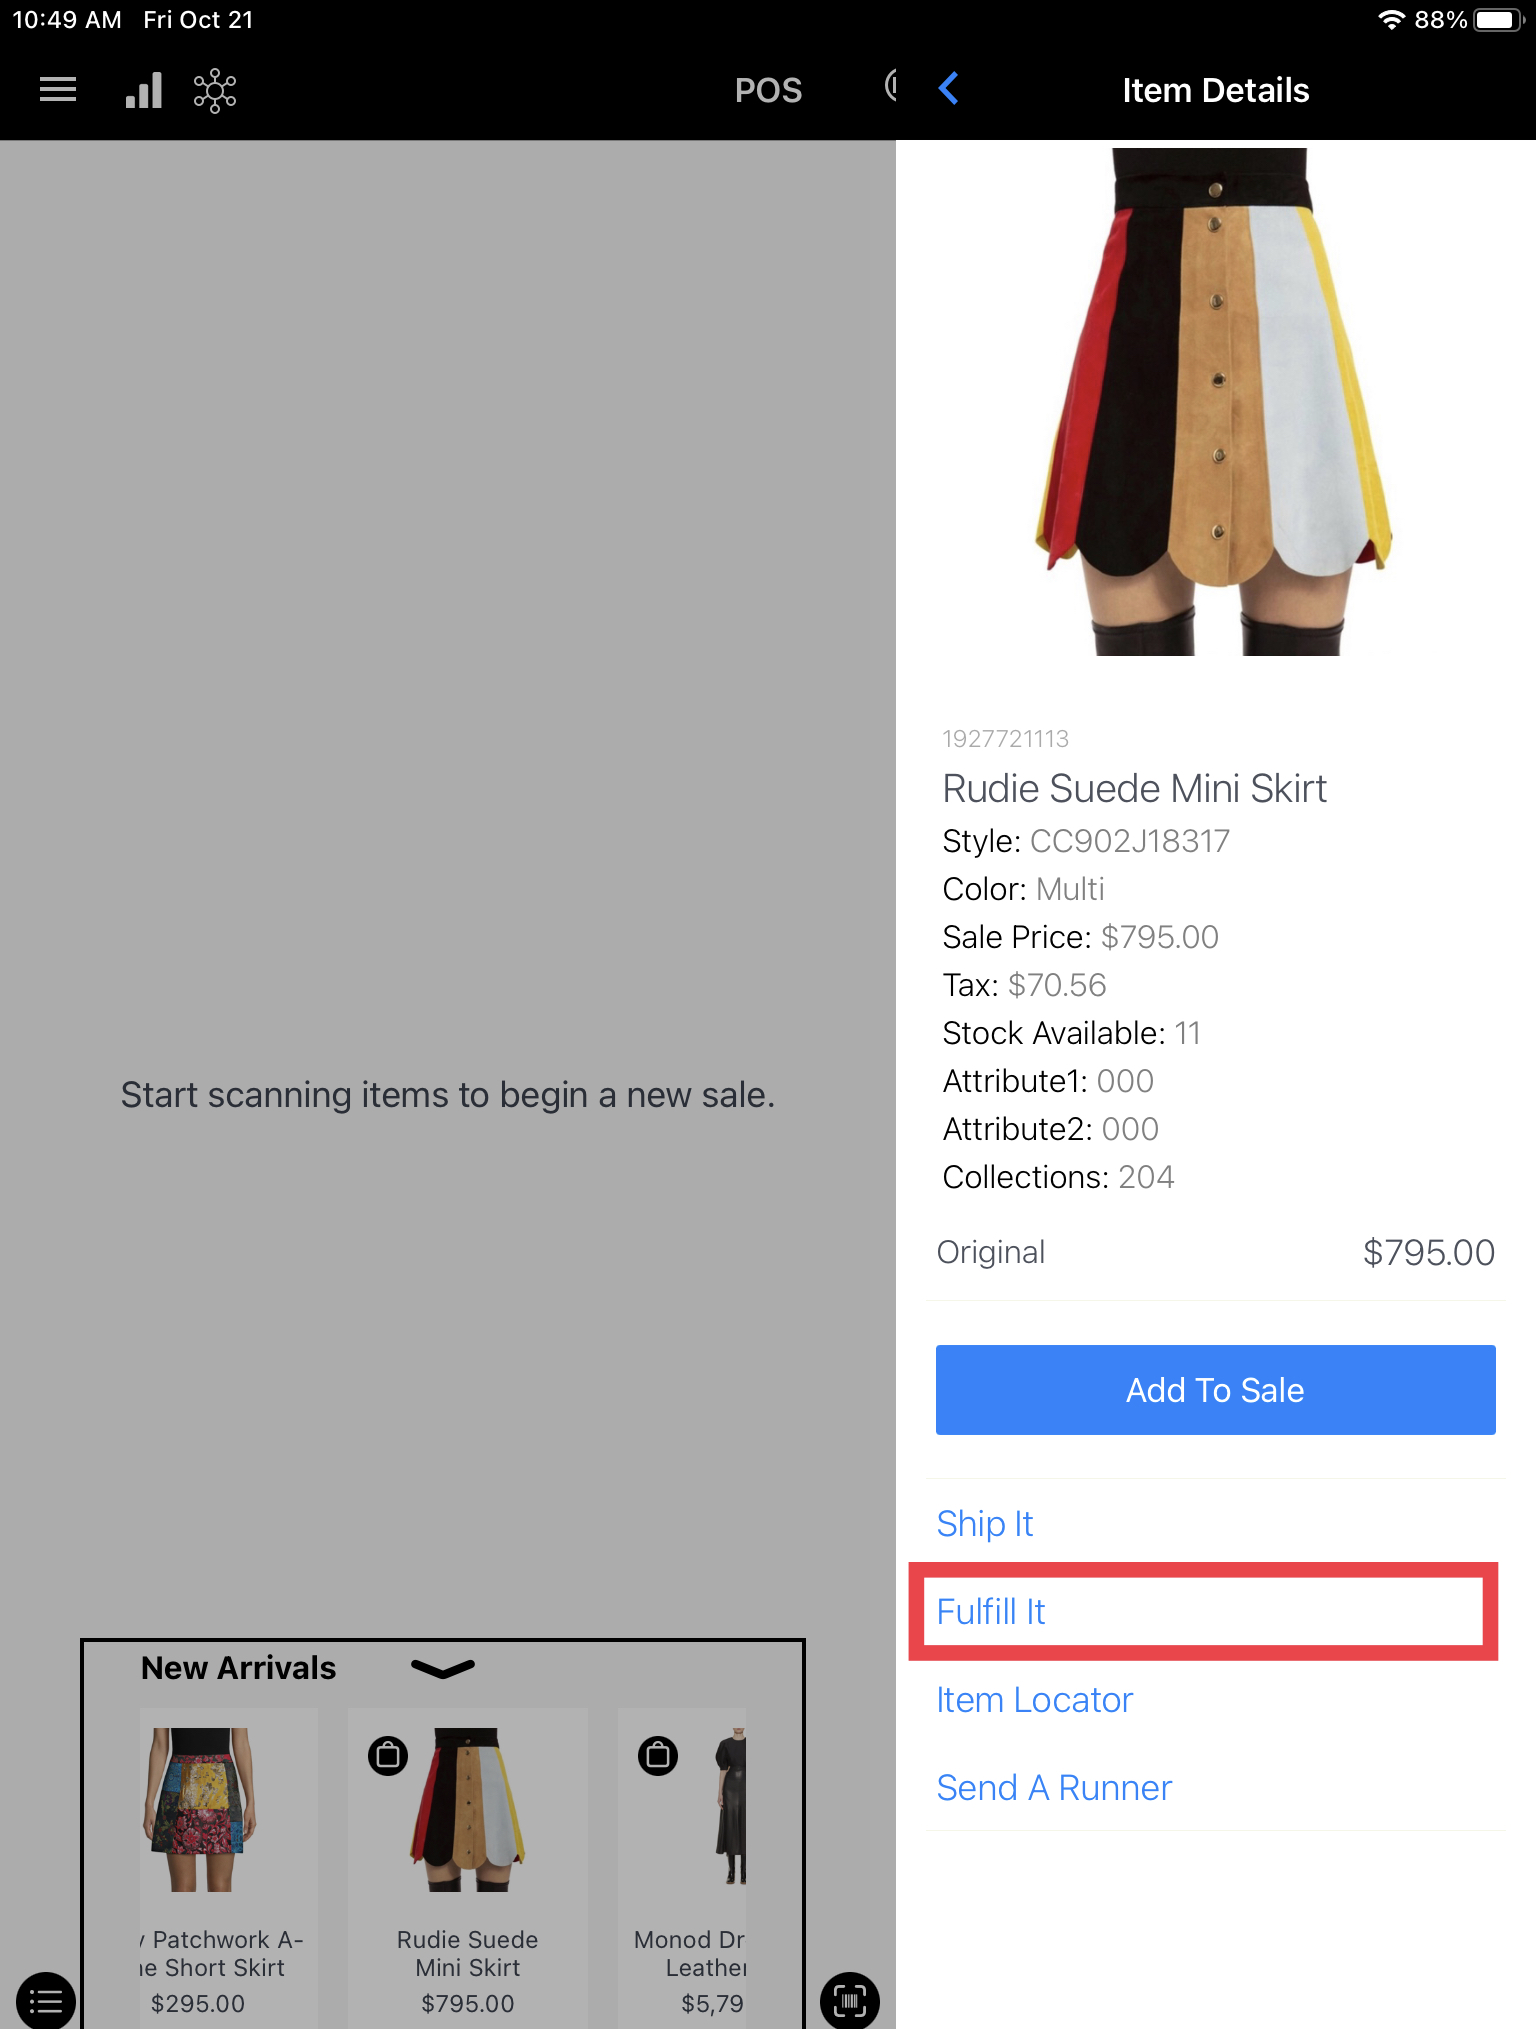
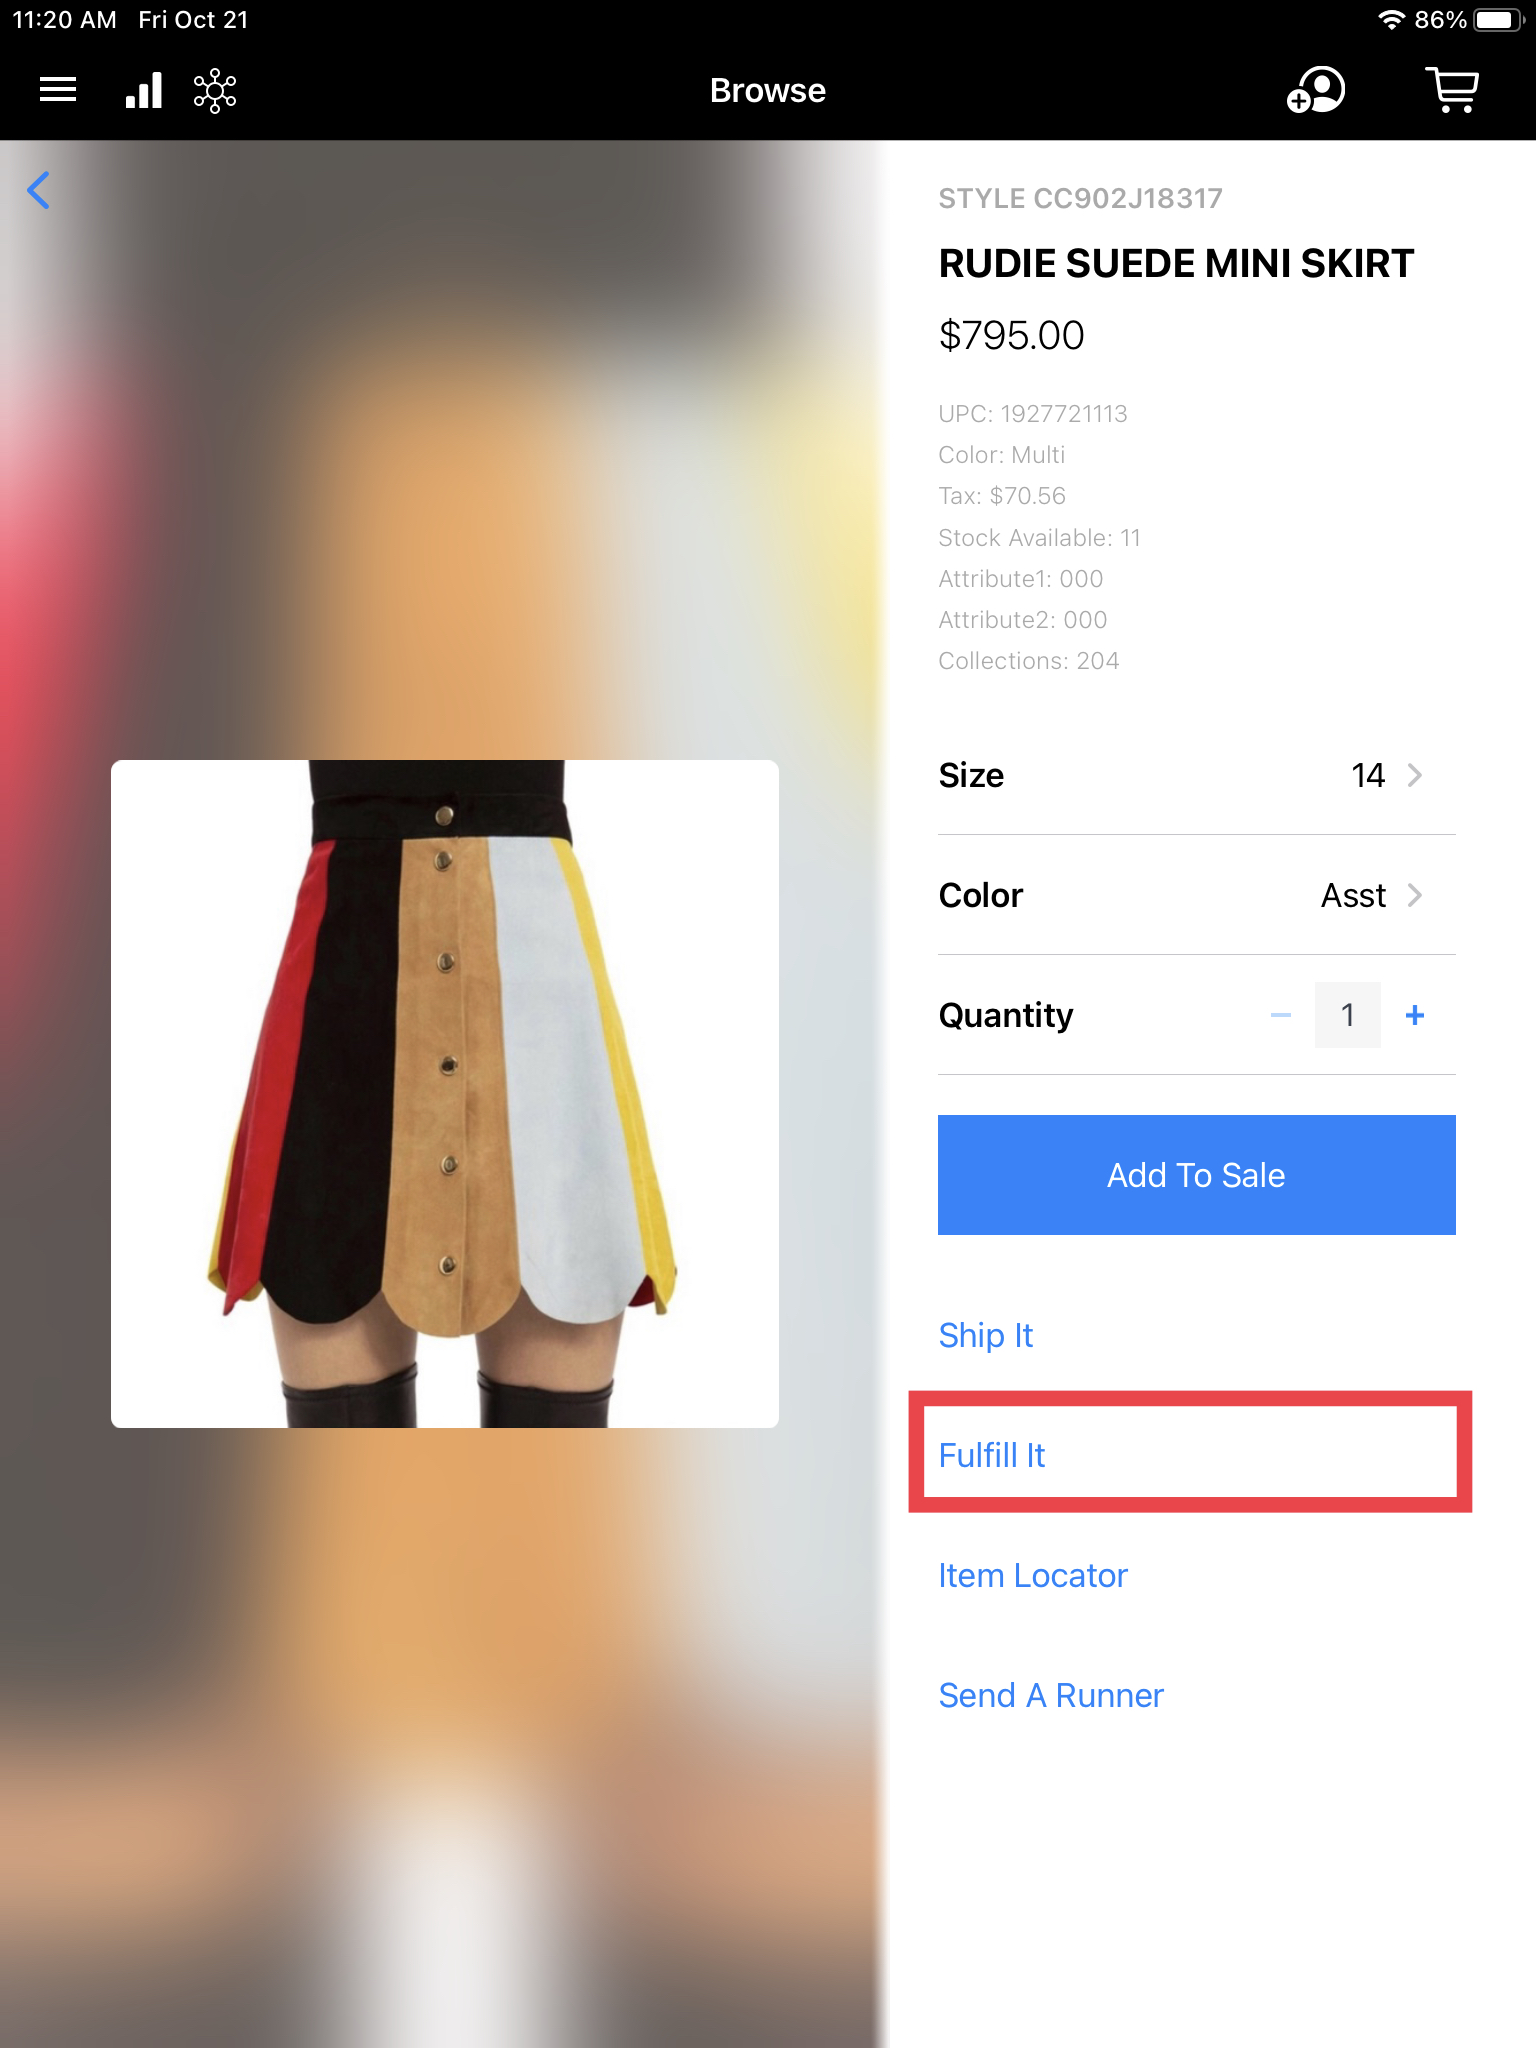
The Fulfill It function allows you to place an order for an item from another location (the fulfilling store). The fulfilling store will then ship the item to the customer directly. Payment is collected at the time the order is initiated.
The following procedure assumes that you’ve already located and are displaying the desired item using the steps in Item Lookup or Style Browser. (During this procedure, we add the customer within the Fulfill It transaction, however, you can add a customer to the sale before starting the Fulfill It transaction if you want.)
Notes:
- Combined sales are supported. A combined sale includes a combination of multiple transaction types. For example, a standard sales transaction and a Ship It transaction, or multiple Fulfill It transactions, or a Fulfill It and a Special Order transaction, and so on.
- Shipping charge quantities and dollar amounts associated with Fulfill It transactions are not included in reporting totals by default.
- When specifying address information in a Fulfill It transaction, as you start entering the address information, you can select an address from Google Places. This enables you to speed up and more accurately capture customer information in-store. If you’re interested in this functionality, contact your KWI Customer Success Manager to discuss pricing models.
- If you’re shipping via FedEx or UPS, you must enter a phone number and email for the customer, and valid FedEx or UPS credentials must be set up in the KWI Back Office in order to print a label and generate a tracking number from the Omnichannel Dashboard if shipping out of another store. Speak to your Customer Success Manager to get this set up.
- For more detailed overview/background information about how Fulfill It processing works, see Fulfill It Processing.
To place a Fulfill It order, follow the steps below:
- From the Item Details screen, tap Fulfill It.
- You can also initiate a Fulfill it order from the Style Browser.
- If configured, the Fulfillment location screen displays the locations that have the item (if any), and the quantity on hand. Tap the store from which you want to ship the merchandise. You can also tap on Location, Inventory, or Quantity to sort.

- Notes: Some configurations will select the fulfilling store for you, in which case you can skip ahead to step 4 (Customer Lookup).
- You can view an interactive map that shows the location of the store(s), along with the on-hand quantity for the item before placing the Fulfill it order. See Item Locator.
- If configured to select the fulfillment location, you can choose to fulfill multiple quantities of the same item (as long as the location has enough inventory to be able to fulfill all units).
- The Customer Lookup screen is where you can specify search criteria and tap search to find an existing customer. If you’ve already added a customer to the sale, this screen will be skipped and the Shipping Addresses screen is displayed instead (described below). Otherwise, tap on Create New Customer to create a new profile and add a shipping address.
- Note: Most search criteria is configurable. Wildcard search is supported in fields such as first and last name. The results will be returned if the string appears anywhere in the field (beginning, middle, or end)
- If you successfully located an existing customer profile, tap on the profile to select a shipping address, or select Pick Up In-Store (if configured). The Pick Up In-Store option will not require you to select a shipping address. The item will be shipped to the store for the customer to pick up. You will still need to select a shipping method.

- On the Shipping Addresses screen, you can optionally tap Edit to edit the shipping address or tap New to add a new shipping address (save your changes when you’re done entering the information).
-
- On the Shipping Method screen, select one of the listed shipping options (these will differ by client). Enter the shipping amount (if applicable), tap OK, and tap Next.

- You will be presented with the Fulfill It Summary screen. The summary screen will allow you to make any changes to the order before adding it to the transaction. The following can be modified on this screen:
- If you are configured for the system to select the fulfilling location, you can modify the order quantities on this screen.
- You can modify the customer’s shipping address.
- You can modify the shipping method.
- You can add an Order Note to communicate important information to the fulfilling location, such as the need for gift wrap, etc.
- Tip: If you need to return back to the Fulfill It summary screen after adding the order to the transaction, simply tap the Item Modifier on the Fulfill It item and select Update Quantity.

- The shipping fee ($0 in this example) is added to the transaction, and the fulfillment quantity and non-merchandise shipping charge quantity are also listed on the right side of the screen. At this point, you can continue to add items to the sales transaction (as part of a combined sale), or you can receive payment for the fulfillment order by tapping Pay, as documented in Receive Payment. (If you’re using an iPod Touch, you’ll need to tap Total before tapping Pay.

- Note: If multiple items need to be fulfilled, you can place another fulfill it order. When doing this, most of the steps will be bypassed except for the Fulfill It Summary screen, where you can change the shipping method and shipping address as needed.
- The fulfilling store will receive a notification message (for example, “Fulfill It Transactions Pending”) on the bottom of the screen until the fulfill it order is processed using the Omnichannel Dashboard. This message is displayed every 20 minutes by default but can be configured. Contact your Customer Success Manager if you would like to change how often this message is displayed.


 Copyright © 2024 KWI. All rights reserved.